Intro

This tutorial assumes you've already created an account.
If you have not, have a look at the signup tutorial.
The first thing you need to do is to configure your timezone correctly.
All time-related information on the platform will be shown in your local time based on your timezone selected.
Go to your profile as shown below.
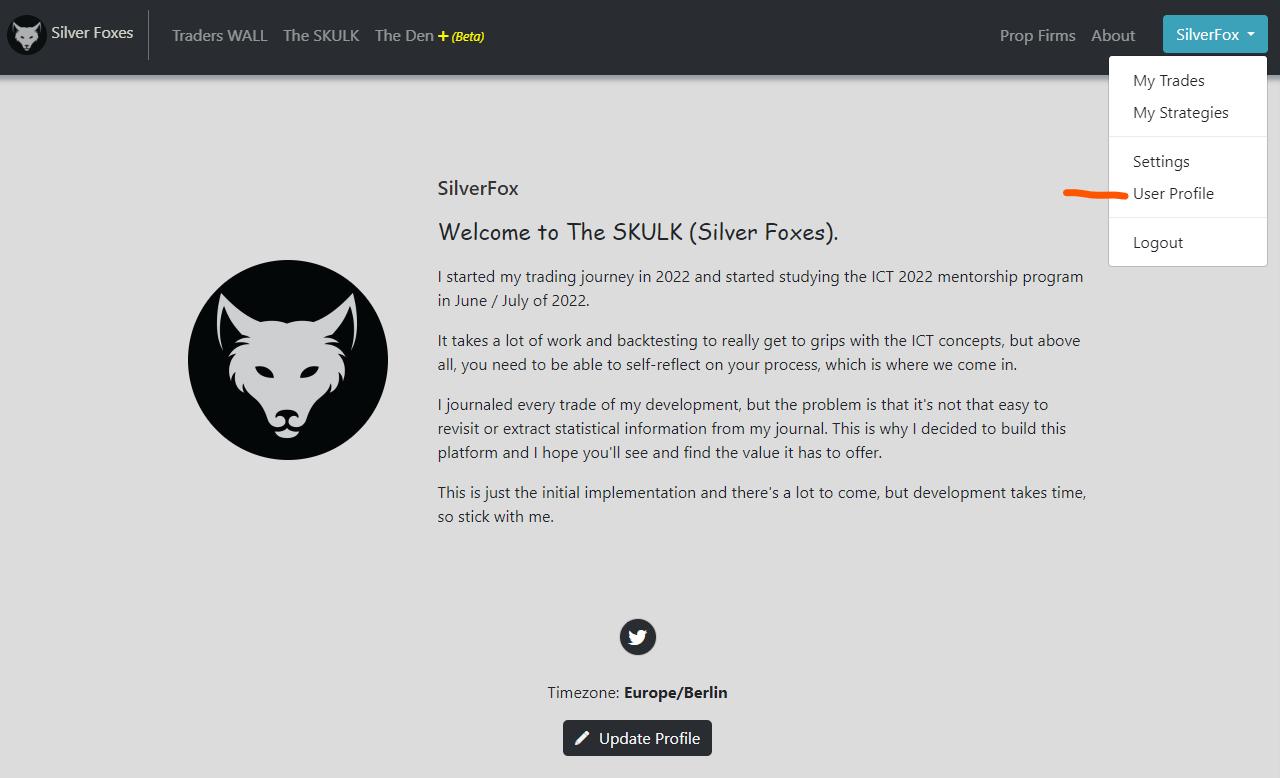
At the bottom of your profile, you'll find your currently selected timezone. It'll default to "UTC" time if you did not choose it.
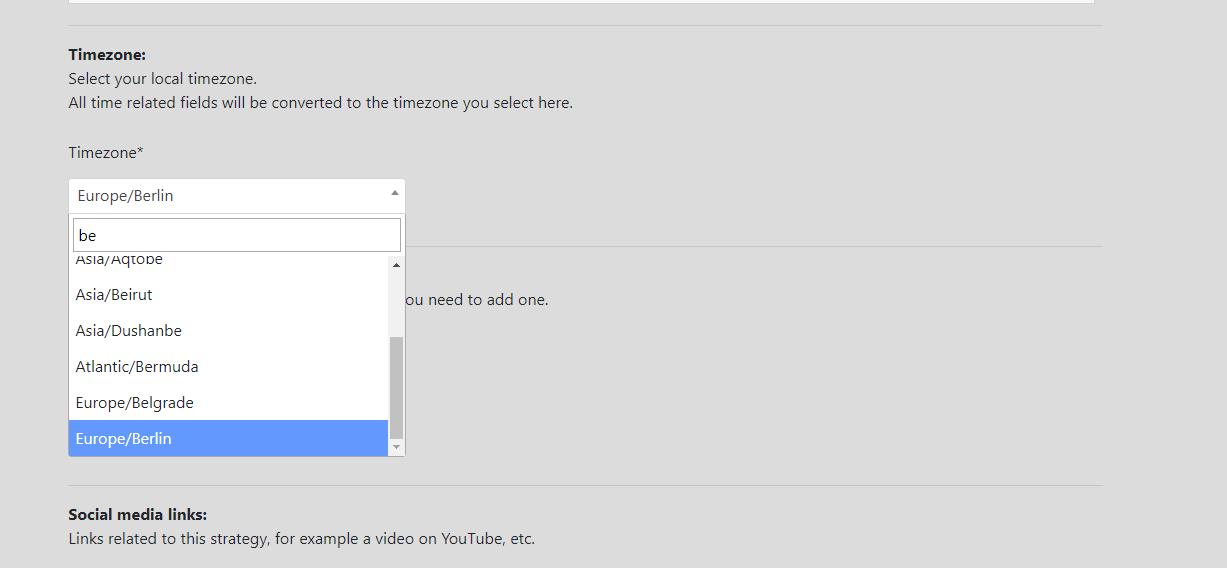
To change it, click on the "Update Profile" button, which will lead you to the page shown below.
Scroll down to the Timezone section and select the timezone applicable to yourself.
Scroll to the bottom of the page and click on the "Save" button to complete the updates.
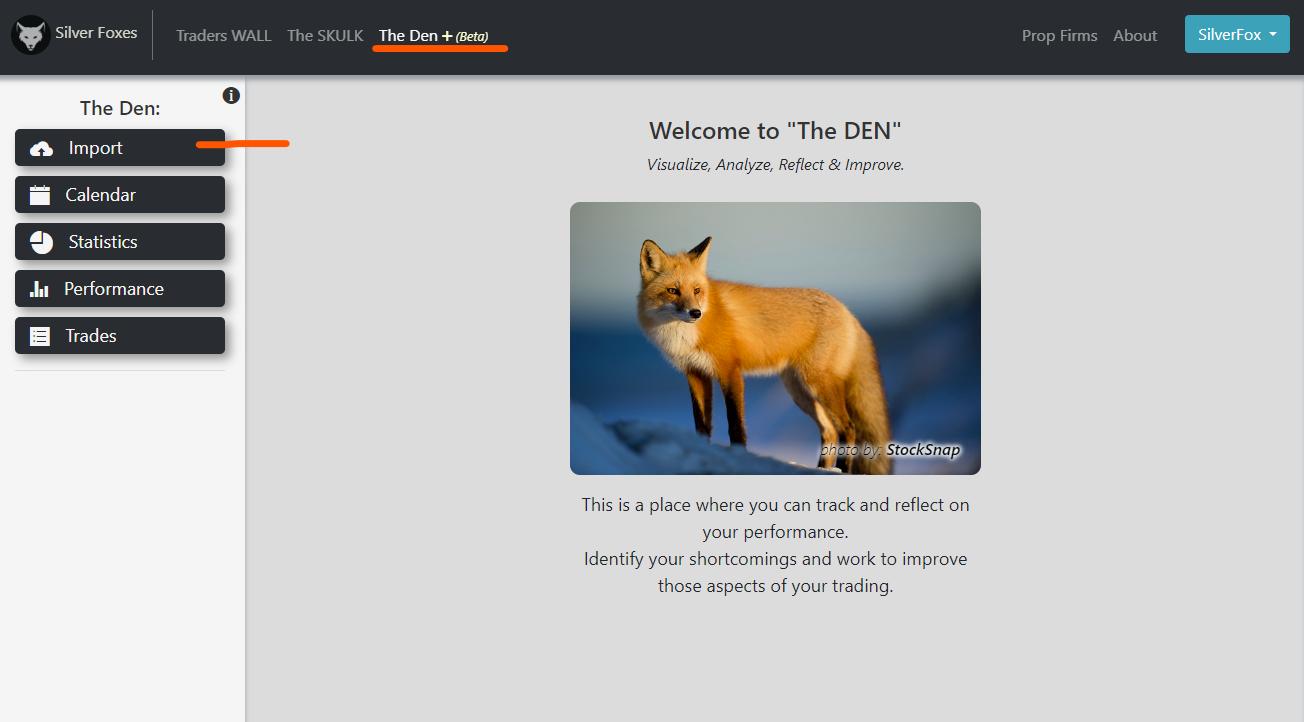
Next, click on the link at the top of the page called "The Den".
This will take you to the page shown below. Click on the "Import" button as highlighted.
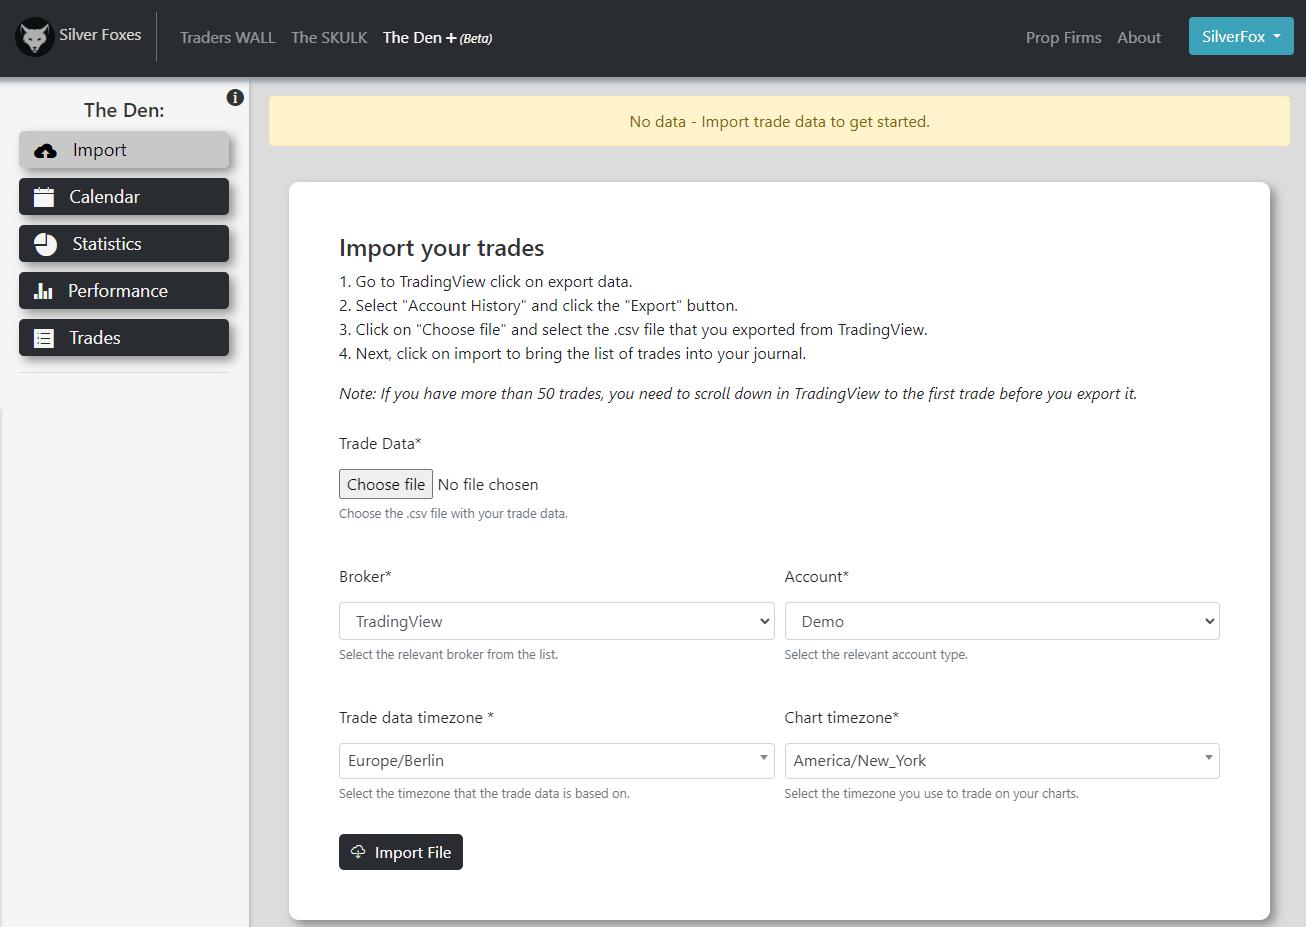
You'll be presented with the page as shown below.
Note the message at the top of the page stating that you have no data.
You'll also note that the "Broker" field will default to "TradingView" and the "Account" to "Demo".
The platform currently only supports TradingView, but over time, more brokers will be integrated.
Also, note how the "Trade data timezone" defaults to the timezone you selected in your profile.
That's because TradingView uses your local time in its trade history.
The "Chart timezone" will default to "New York". Change this if your chart is set to a different timezone.
Next, let's have a look at how to export the data from TradingView.
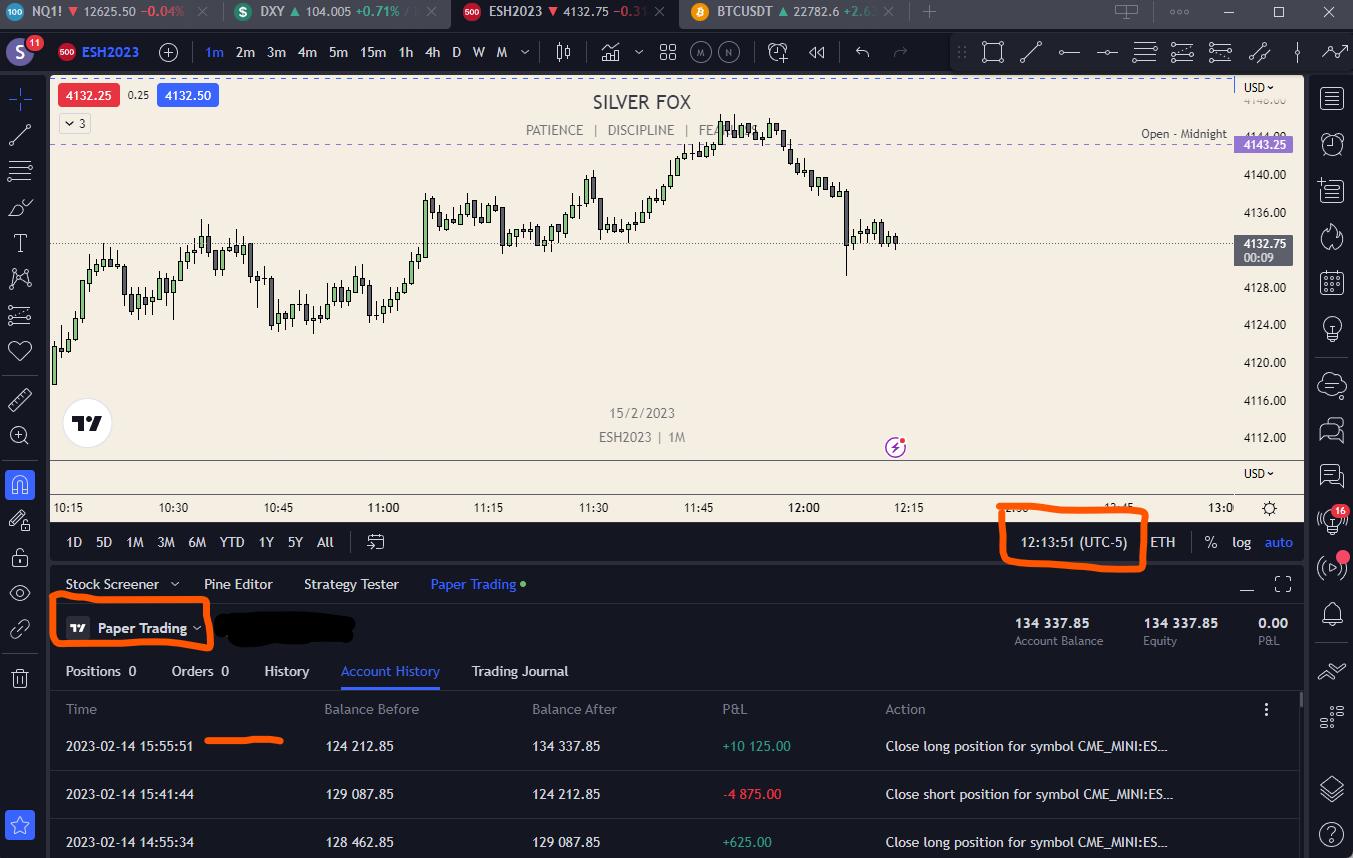
Below is a screenshot of TradingView. Make sure that you're logged into your "Paper Trading" account.
Confirm that the Time in the Account History corresponds with your computer (local) time.
Also take note of the "Chart Time" as highlighted below.
These times have to correspond to the selected timezones in the "Import" section of the platform.
In your TradingView Account History, scroll down until you reach the very first trade.
If you have more than 50 trades, TradingView will only export the last 50 trades.
By scrolling down to the first trade, it'll include all your trades in the export.
Also, make sure you have all 5 checkboxes selected as shown below.
This will ensure that all the required data is included in the export.

Click on "Paper Trading", which will open a dropdown box. Click on "Export data".

Then select "Account History" and click on the "Export" button.
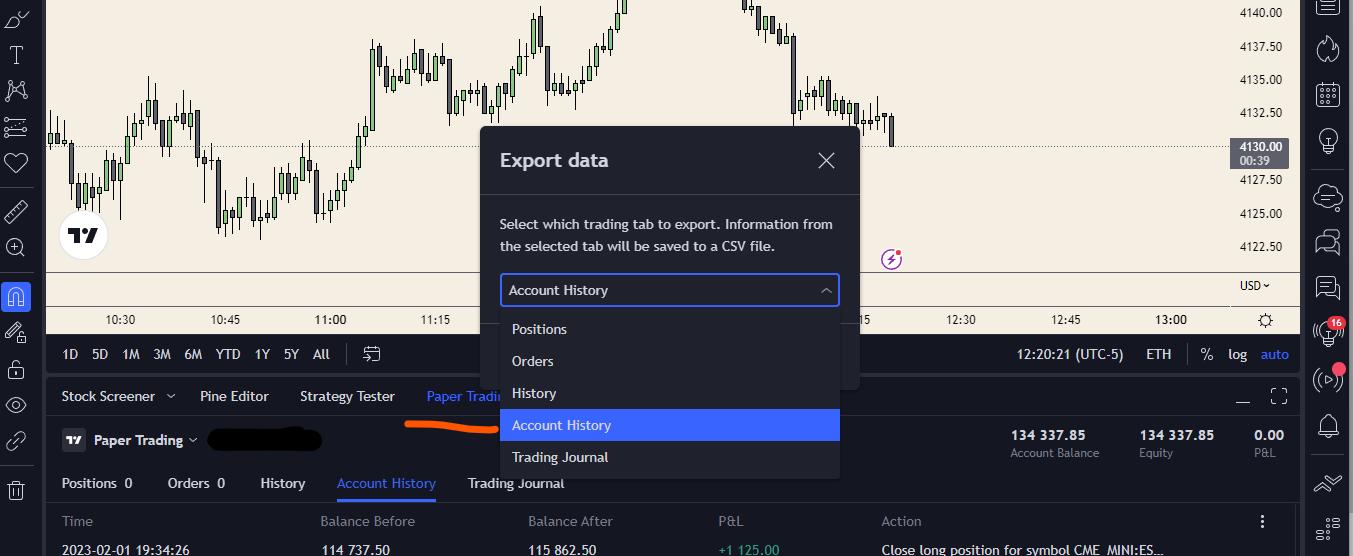
You'll see a popup which shows you where the file was saved. In my case, it's the "downloads" folder.
NOTE: Do not modify the .csv file in any way. The file is validated when you import it into The Den and it will not import it if the file has been modified.
This is done to ensure that your results are authentic and not cooked in any way.

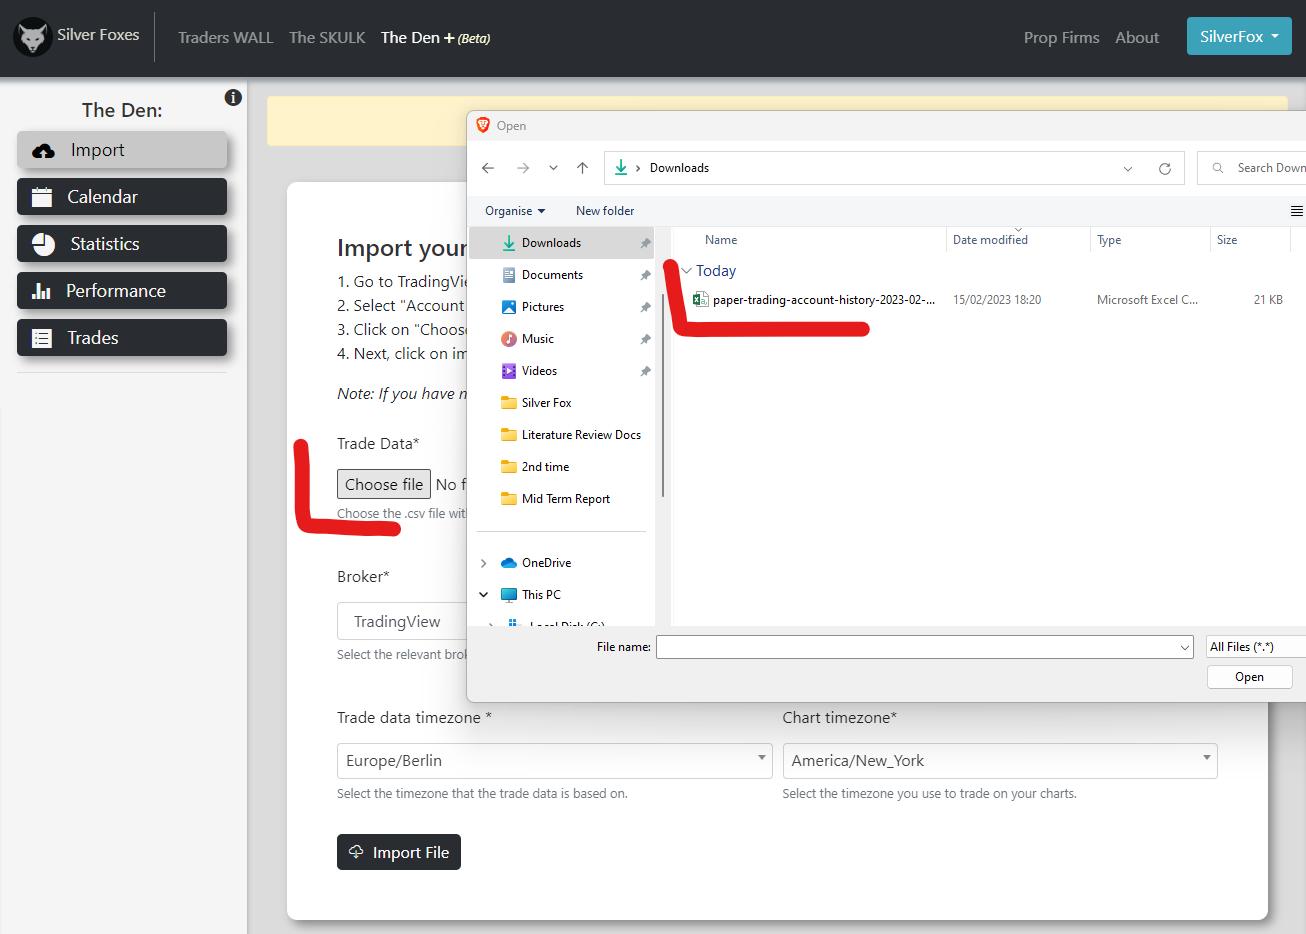
Next, go back to "Silver Foxes", click on the "Choose File" button and then select the .csv file in the downloads (or whichever one was specified with your export) folder.
Finally, click the "Import" button at the bottom of the page, which will then import all your trades.
A message at the top of the screen will give you feedback regarding the import. If you have any problems, contact us.
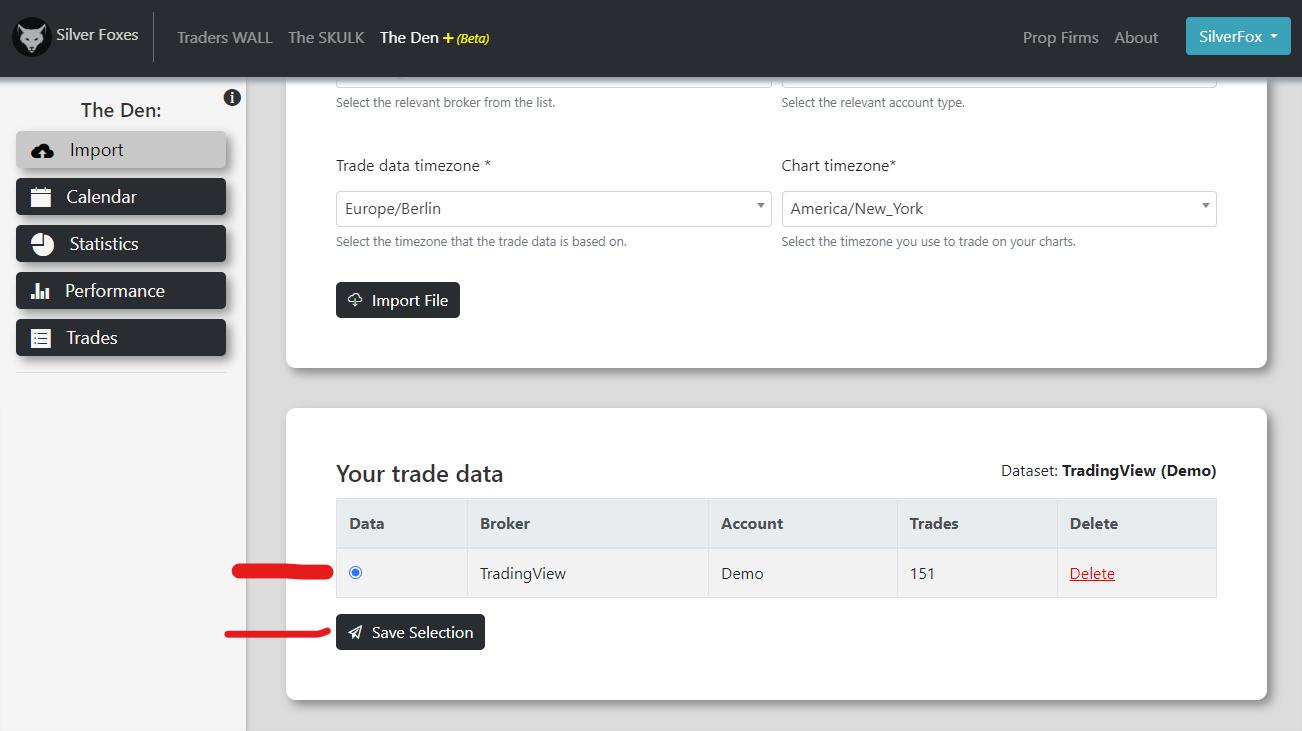
The final step is then to select your data from the "Your trade data" table and click on the "Save Selection" button.
Once we integrate more brokers into the platform, you'll be able to import multiple accounts and you'll be able to choose which data to display from this table.
That's it, you're all set to analyse your data. Below are some screenshots of what's currently available.
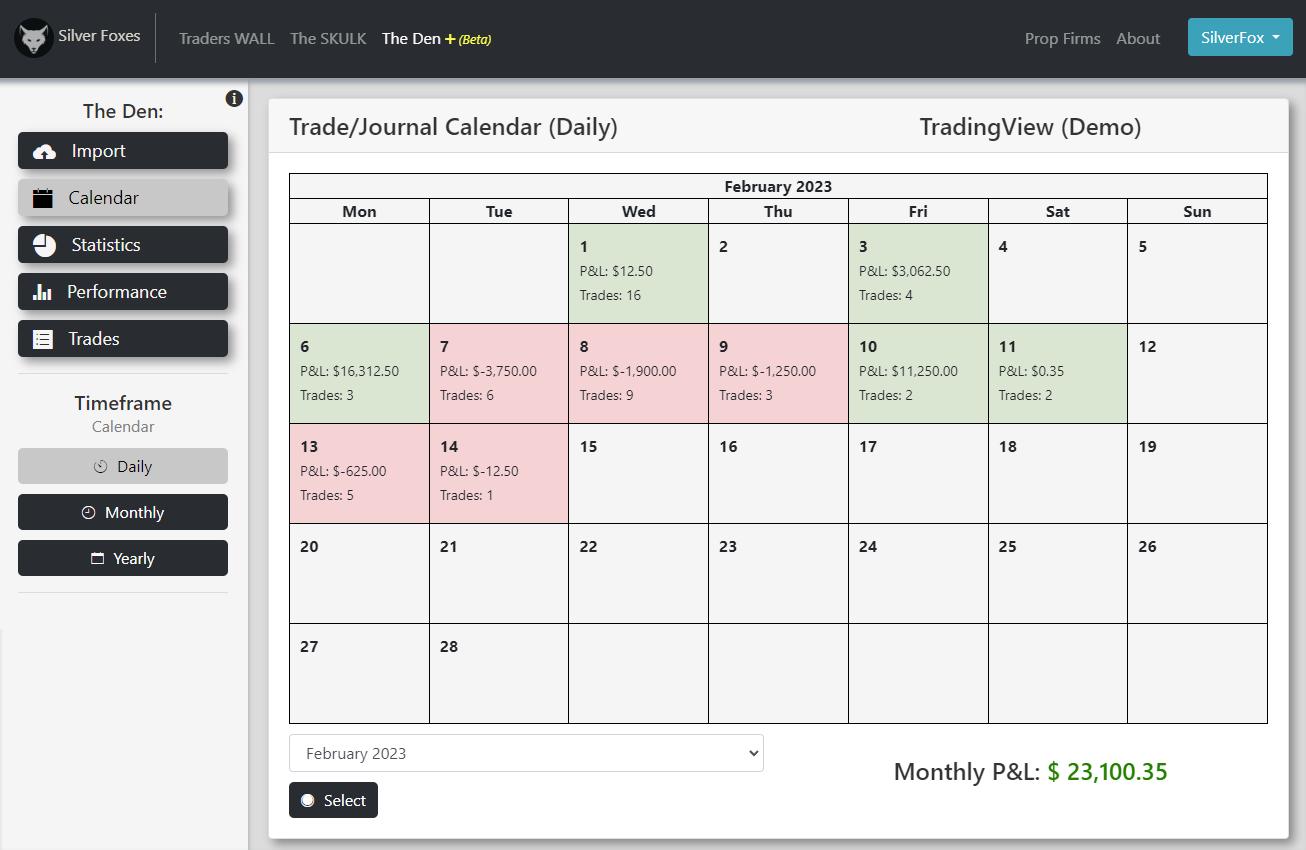
Calendar
The calendar will display your data in a calendar view, with "Daily", "Monthly" and "Yearly" timeframe selections.
Statistics
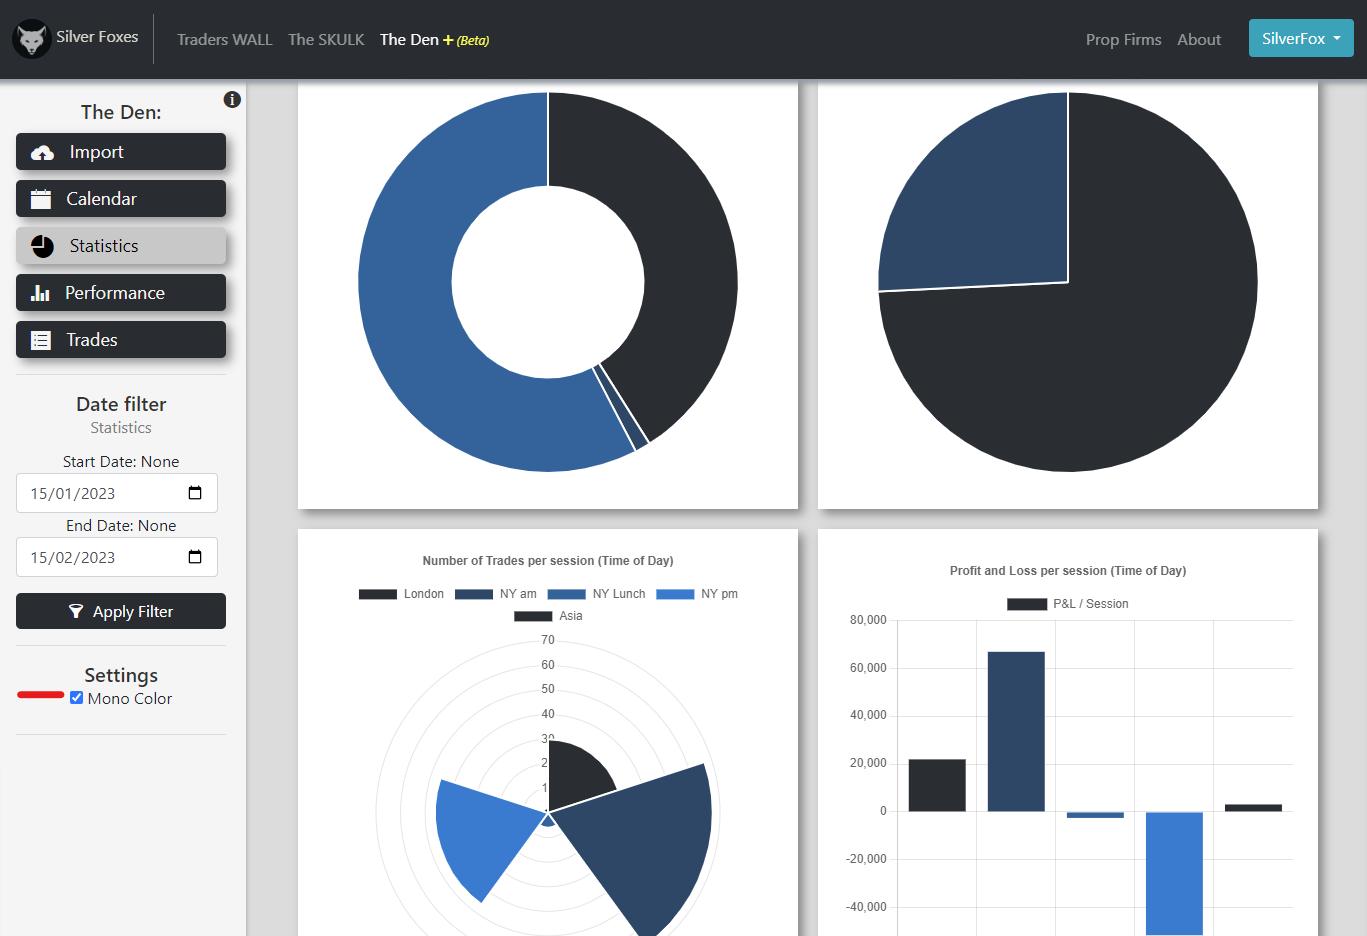
The statistics page will display a lot of crucial information, such as your "Win Rate" for example.
You have the option to toggle between two color options from the "Settings" as highlighted below.
Performance
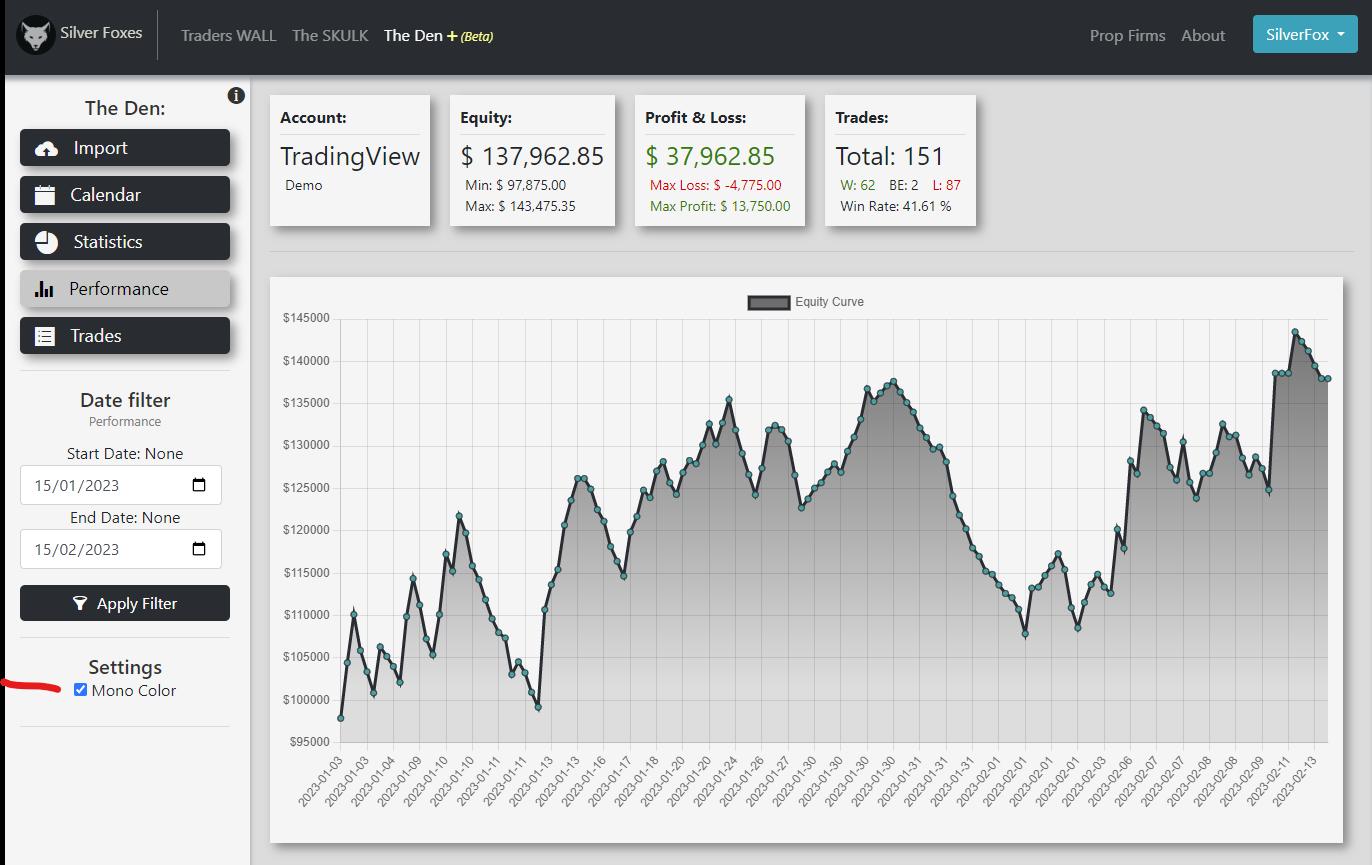
The performance page will show your "Equity Curve" and P&L in a bar chart format.
Again, you have the option to toggle between two color options from the "Settings" as highlighted below.
Trades
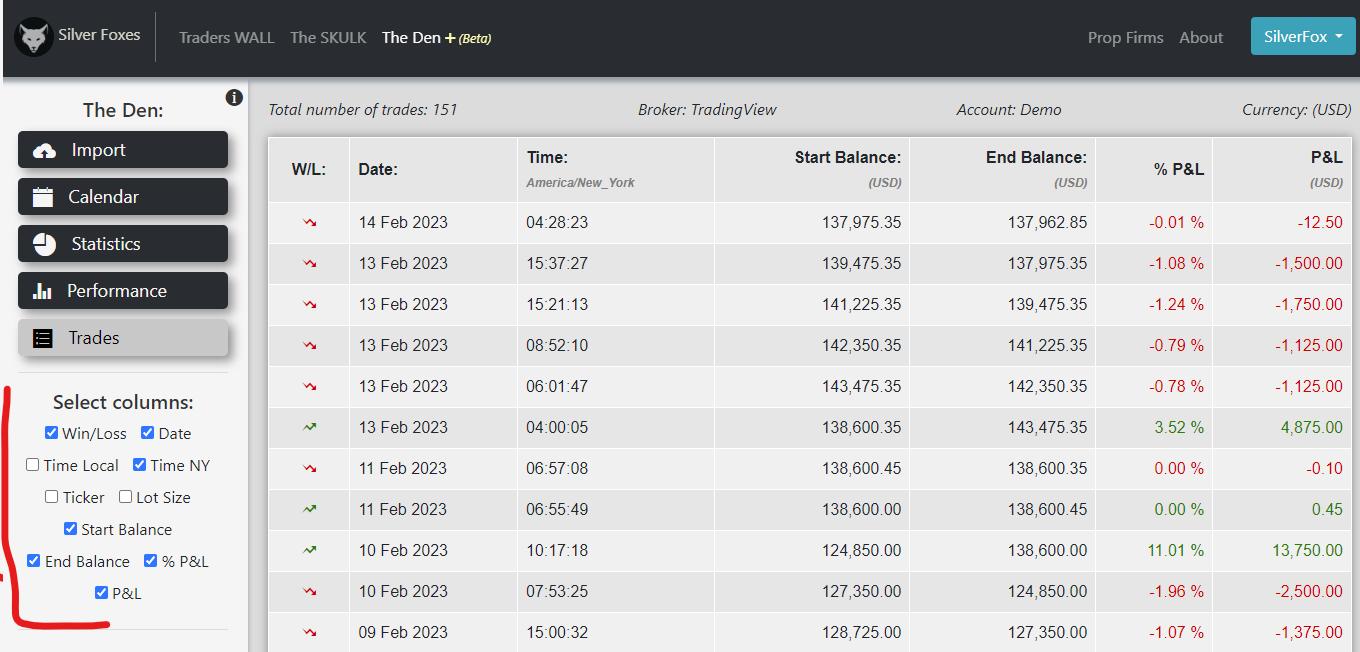
Here you'll see your "Account History" in a table format.
You have the option to select which columns you'd like to see from the panel on the left as highlighted below.
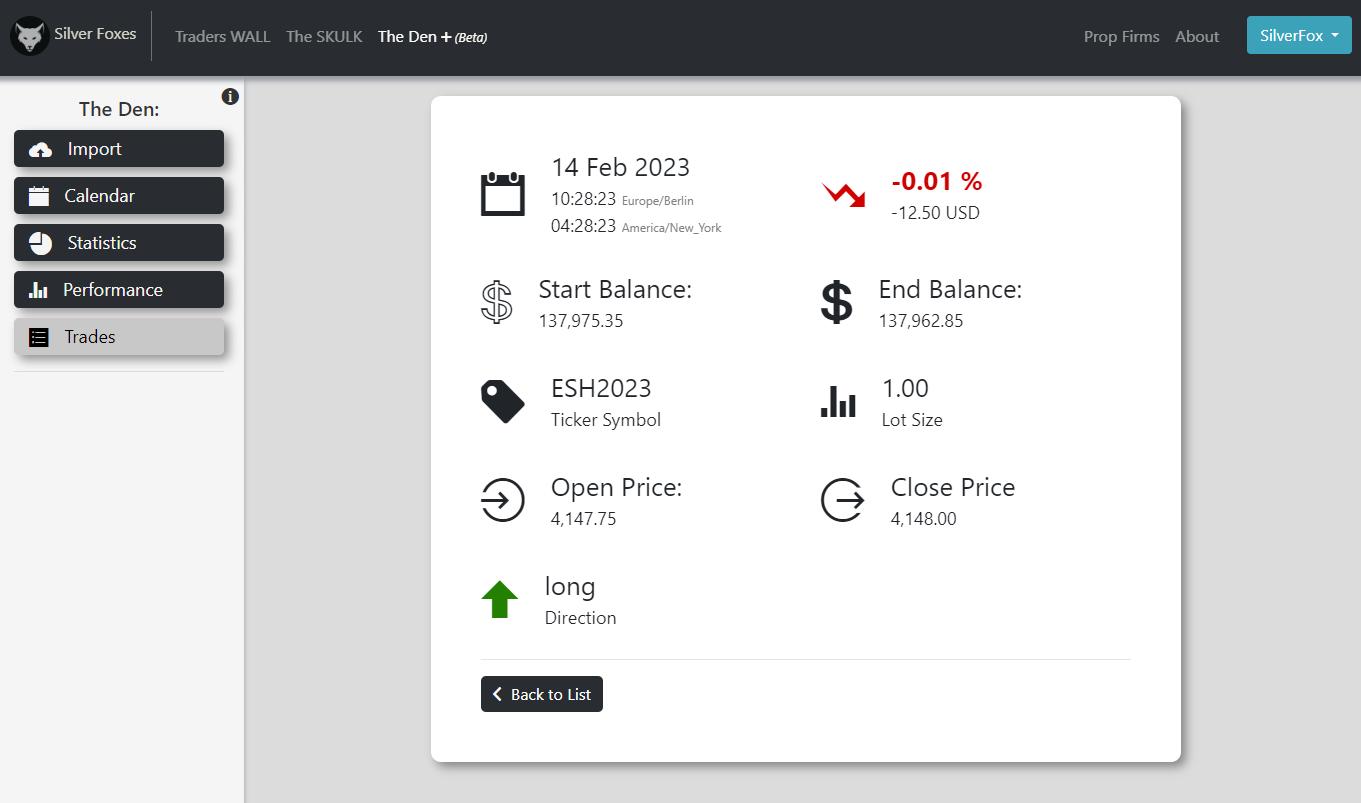
Each trade on the table is clickable which will lead you to the detailed trade information.
Detailed Trade Information
The detailed trade information from the selected trade will be displayed.
That's it.
Thanks for your interest in the project and if you have any suggestions, please contact us.
Kind regards.
Silver Fox.